Showing posts with label DIY. Show all posts

DIY Vintage Equestrian Feed Sack

Saturday, June 15, 2013

I never seem to be quick enough with the auctions on Ebay.  I always lose.  And it's so frustrating, right?  Not so long ago, I missed out on a couple of amazing feed sacks that I really really wanted.  Thought I had them, but lost in the last few seconds, literally.  I couldn't seem to find anymore like them anywhere so I just decided to try making them myself.  It took forever, mainly trying to figure out just the right font to use, and then cutting out all those letters.  But luckily, it's summer and sometimes it's pretty relaxing to sit and cut things out like when we were kids, right? 


Here's how I made them.....

To start, I washed and bleached a couple of pieces of dropcloth, dried them and laid them out flat to start stenciling on the words and art.  The fonts I used are available for free download on 1001freefonts.com.

The font I used for the TRAINERS' CHOICE sack was called Libel Suit.

The font used for the word OATS is called Steelfish.

And the font used for the words FOR RACEHORSES is also Steelfish. 

Fonts used for the JOCKEY OATS artwork is all Steelfish.

You can play around with the sizes.  I don't remember the font sizes that I used because I tried so many different sizes.  It really depends on the size of the piece you're going for.  Both my framed "sacks" are 22 x 28" so they would fit into a 22 x 28 inch sized poster frame that I picked up at Walmart.

The horse and jockey artwork is easy to find online, just google horse silhouettes.

After I had all my letters and artwork printed and cut out to use as stencils, I laid them on my dropcloth to determine their position.


To get just the right color, I used craft paint and mixed together 1 part Skyline with 2 parts Steel Gray.


Then I started stenciling it on lightly.  Make sure that you don't completely paint in the letters.  Otherwise it won't look aged and original, it will look like you painted on fabric.


I could have actually gone lighter here but this was my first experiment.  I stenciled the artwork on first and then did the words around it.  It seemed to be easier to get everything even that way.  And that's it!

I absolutely love how they turned out.

My hubby brought home this fantastic green piece in the photo above from a storage auction.  It was originally wood but the stain was in bad shape and the hardware was dated.  So, I replaced the hardware with something better, painted it this amazing shade of green, Valspar Homestead Resort Olive, and then distressed it with Minwax special walnut stain and wiped off.  I wish I had remembered to take a before photo so you could see the sorry shape it was in.  I am loving the pop of green color.


As you can see I've updated with pillows and the same curtains I added to our den.  The blue pillow fabric came from here.  The bird pillow I made by stenciling a bird silhouette onto green fabric that I already had.


My thoughtful hubby picked up that sweet old oar behind the couch at an auction.  It was in perfect condition and I think it's lovely.  :)


The green seed stock sack I actually did find on Etsy several months ago, so of course, I made a pillow out of it.  I'm crazy about that green color.


Also, see that vintagey looking record player on the bookshelf?  My hubby bought that for me because I absolutely love listening to old Frank Sinatra and Ella Fitzgerald albums.  Problem was, it was a color that I didn't care for, burgundy.  Can you paint those??  Well, I sure did!!  I taped off the dial in the center and just spray painted the whole thing white.  Love it!!

If you have anymore questions about the DIY sack and art, I'll answer them in the comment section!  :)

Christmas Advent Calendar - DIY

Sunday, December 2, 2012

I've always wanted to make my own Advent Calendar and every year I never do.  It seems that whenever I finally have the time, December is half over and it seems kinda silly to make one at that point.

But this year, I did it.  And I'm so happy with how it turned out.


 It is Pottery Barn inspired and it cost less than $20 to make.

To start, I picked up a some little white mini metal pails at the Dollar Tree in the wedding favor section.  They come in packs of 3, so I bought 9 in order to have 25 pails.  I brought them home and spray painted them with chrome colored spray paint to give them a galvanized metal look.  You could also use galvanized metal pails but I couldn't find any locally, so, this was the next best thing.


After all the pails were dry, I attached numbers to the front with double sided tape.  Here's the printable I used for my numbers.  For some reason there were only 24, so, I found a 25 online that was similar and printed it out as well.


Next up was the frame.  I picked up 6 - 3 x 6's at Lowe's and cut them down to have 7 - 32 inch long boards.


I laid them front side down and attached two beams with screws to the back to keep them together.


After that was finished, I stained the entire piece with Minwax dark walnut stain.  (sorry, no picture)

I wanted to frame the piece to give it a finished look and to also hide the beams in the back, so, I measured the sides and bottom and cut each piece at a 45 degree angle to create a frame around it.  I made sure to buy 2 extra 3 x 6's for the frame and then just turned them on the side and attached with a nail gun.


Then I stained those as well.


To hang the little pails, I wanted to use something unique, so, I picked these vintage styled nails that I found in hubby's collection.


I basically just eyeballed everything and created 5 rows of 5 nails for the 25 pails, predrilling holes first.  I hung all the little pails and then stenciled JOY at the top with vintage stencils and here's how the whole thing turned out....


I think this is one of my favorite projects to date!  I'm so glad I made the time to try making one before December was half over.  :)


I can't wait to hide little treats and notes in those little pails for my kids and hubby to find each day until Christmas.  It will give them big smiles and they will love it...  :)

Stay tuned for how it looks in the room and more Christmas decor coming up!

Have a great day!
Diana

DIY Easel Chalkboard

Thursday, October 20, 2011

Hey there!  After receiving several requests, I put together a tutorial of the easel style chalkboard I made for our front porch.  I am certainly no expert at making these and there may be an easier way, however, this is how I did it.  I used inexpensive 1 x 2's and leftover bead board.  You will also need 8 L brackets, two screw eyes, two small hinges and a piece of twine, I used hemp.  Total cost was around $15.
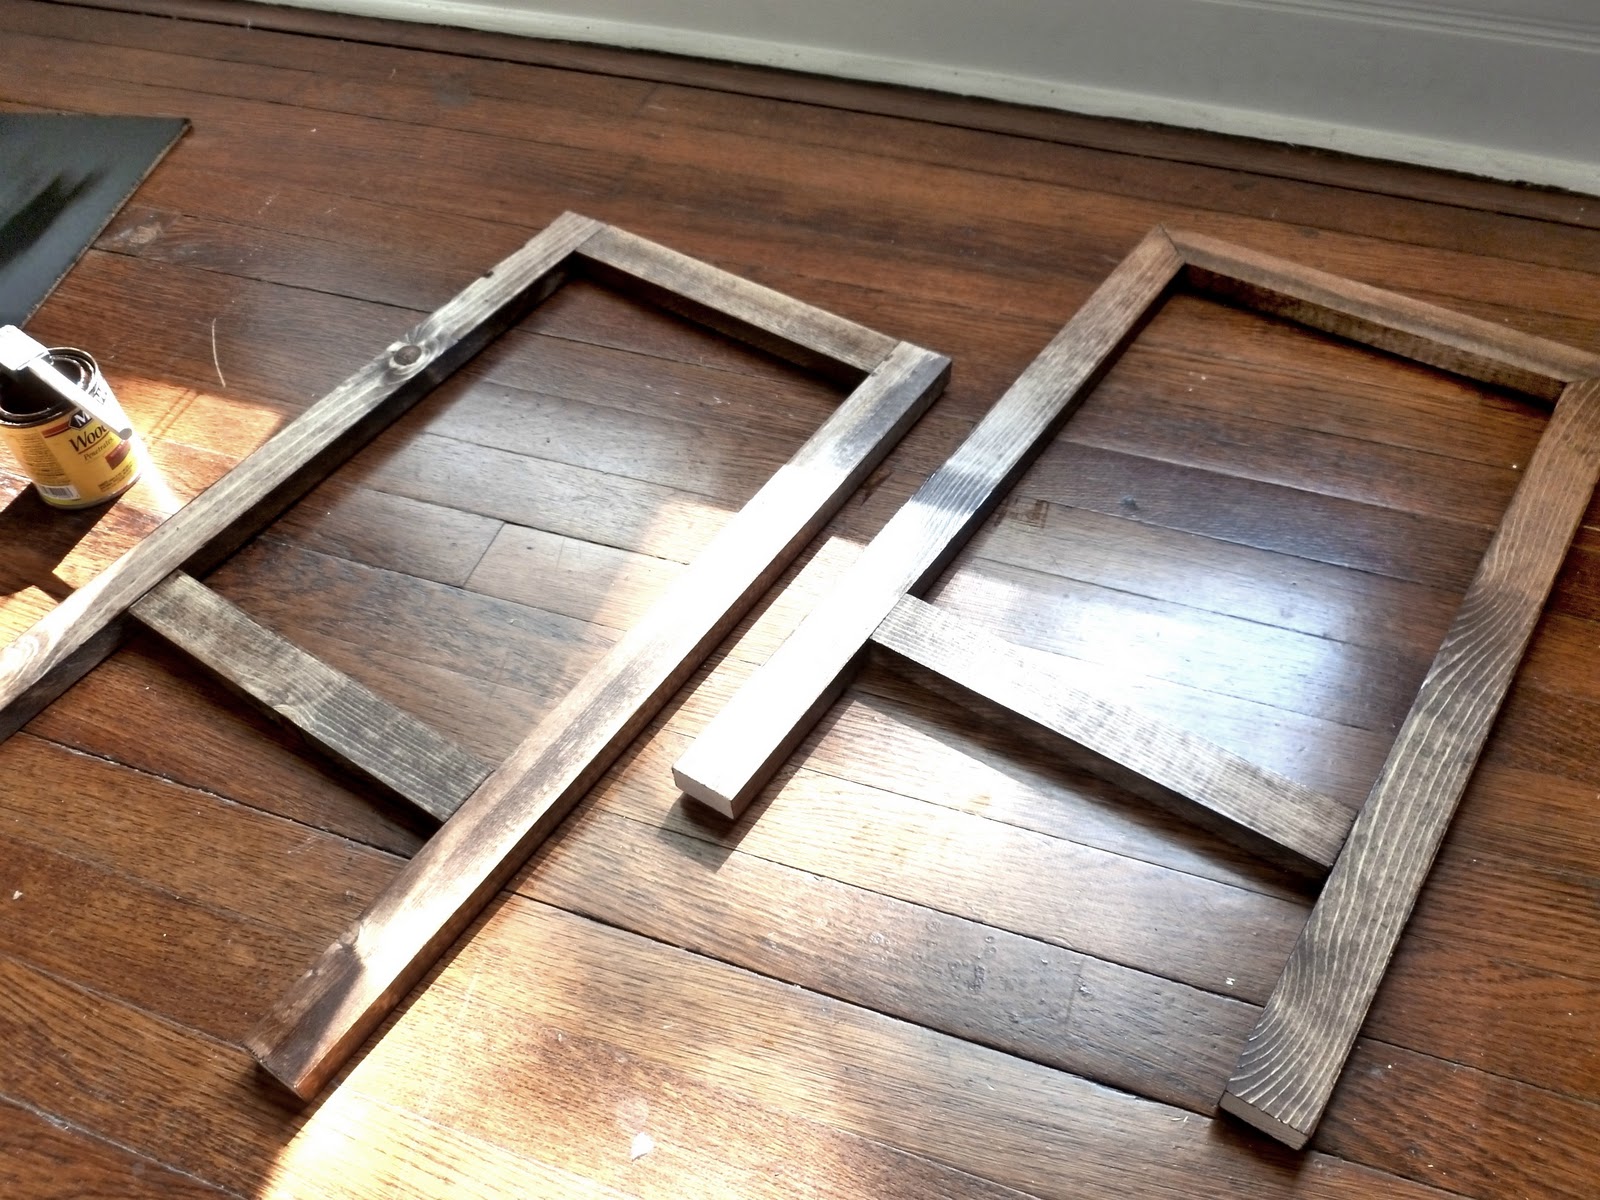
Since I already made the larger one for the front porch, I decided to make a smaller tabletop version for the tutorial that I could use in the kitchen or dining room.   Decide on the height and width you'd like to do and then cut your wood based on those measurements.  This one is 23 inches high and 13 1/2 inches wide.  Put your pieces in position to get ready to attach them.  I wanted to make this easy using as few tools as possible, so I attached my pieces with L brackets.
Attach all 4 L brackets for each side.  You will have two of these sections.
Next up, I applied two coats of Minwax Stain in special walnut.  Make sure you do both the front and back of the two frames.
While this is drying, apply chalkboard paint to whatever you are using for your chalkboard.  I used the back of leftover bead board that I cut to be a little larger than the inside portion of the frame.
Paint both pieces and let dry.
After everything is dry, place your chalkboards (chalkboard side down) on the back of each frame and attach.  I used wire brads because it's what we had.
Remember, this is the back of the chalkboard.  Next, just to make everything look nice, I put a coat of chalkboard paint over the white bead board so it wouldn't stand out so much under the frame.
Next, you will need two screw eye hooks.
Insert one into the bottom center of the chalkboard on the inside.
Do this with both sections and then line them up, back side facing up, tops together.
Yes, my paint is still wet, I tend to get in a hurry when I do projects because I'm on limited time with dinner, picking kids up from school, etc...  Take your two hinges and place them where I have in the photo above and attach with the screws provided.
Now, fold over the entire piece and stand it upright.  Take your piece of twine...
And make a knot in the end.  Thread it through one of the hook eyes you inserted inside the easel.
Thread the other end through the other hook eye and make a knot.
This will prevent it from sliding open and falling.  Some have chains, but I like something more natural like twine.  And that's it!  You have an easel style chalkboard!
I'm going to use this one in our dining room on our console table with a very special gift that I received the other day from someone and I'll be blogging about that soon.  If you have questions about this tutorial, just ask in the comments or email me.  If you do make one, I'd love to see pics!  Have a great day!